Getting started as a JD Developer
Most of the team uses the free Java IDE Eclipse to work on JDownloader. JDownloader's Sourcecode is stored on a "Subversion" server. To "Check out" the latest code, and to commit changes, you need a Subversion Client. We prefer an integrated solution, and thus use the Eclipse addon "Subversive" as Subversion Client. Moreover, we recommend to install Oracle Java JDK 1.7.0_2., or whatever is the latest version.
Install all required tools
Download and install these tools in the given order
Java JDK
Eclipse IDE for Java Developers
Set up Eclipse
Start Eclipse. Eclipse will ask you to choose your workspace. This is the folder where Eclipse will save all your code and project settings.

Add the installed Java JDK. Click Menu [Window]→[Preferences]

Navigate to [Java]→[Installed JRE]
If JDK is not listed, click [Add], continue with Standard VM [Next] and select [Directory] to choose your JDK install directory. Usually this is something like C:\Program Files\Java\jdk1.8.0_45 (for windows). The current version is most likely higher.

Click [Finish], and make sure to choose the JDK as default:

Close the dialog with [OK]
Install Subversive
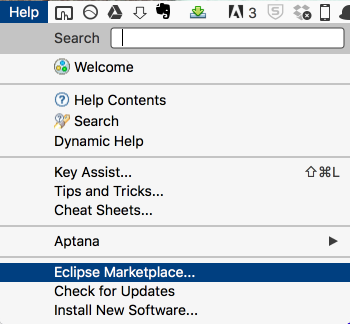
In order to install Subversive, click on [Menu]→[Help]→[Eclipse Marketplace...], search for 'svn' in the searchbox, and install the latest version (currently 3.0.0) of 'Subversive SVN Teamprovider'.

Setup Projects
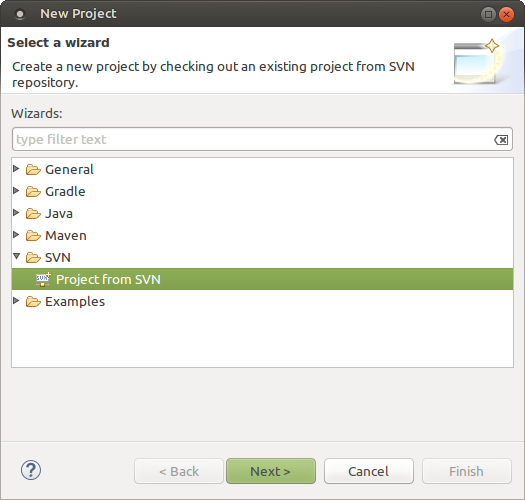
Choose Menu →[File]→[New]→[Project...] (NOT Java-Project!)

Choose [SVN] -> [Project from SVN] and click [Next>].
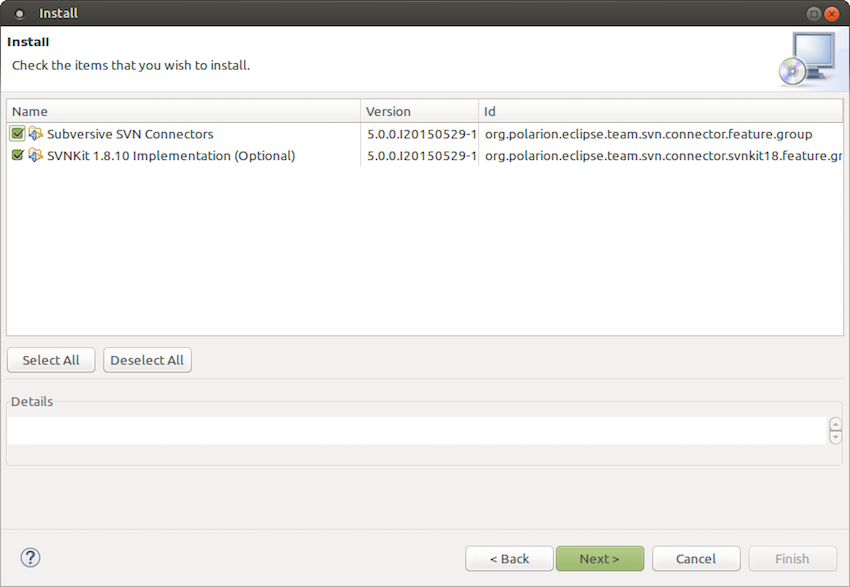
Choose an SVN Connector. We recommend using the latest version of SVN Kit (currently SVN Kit 1.8.10). Then click on [Finish]

Check the boxes "Subversive SVN Connectors" and "SVNKit 1.8.10 Implementation", then click [Next>].
In the next dialogue, you have to enter the SVN URL from which the code will be downloaded ("checked out"):
- svn://svn.appwork.org/utils
Select "Head Revision" and click on [Finish]
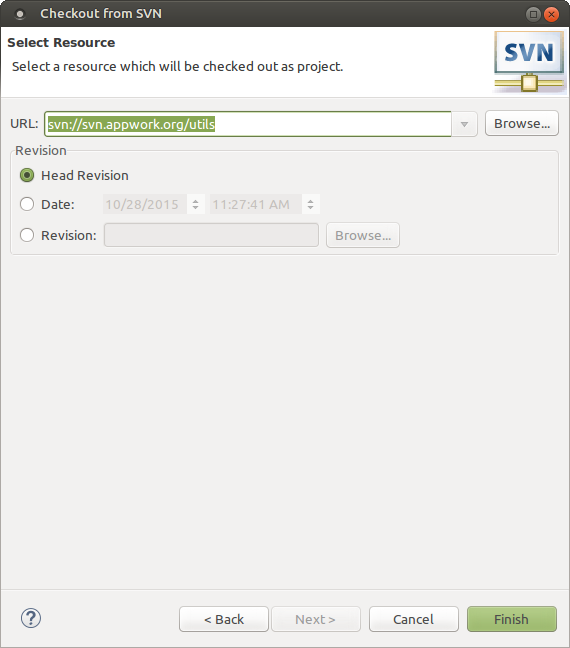
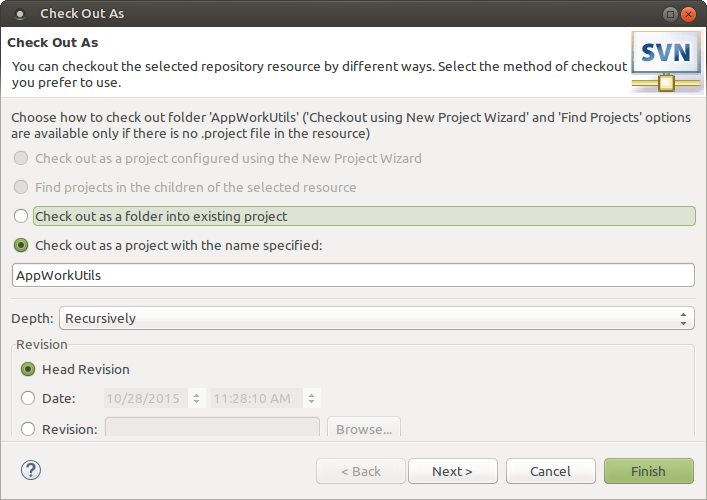
Now check the project out as a project with the name: "AppWorkUtils". Keep the depth recursively and the revision to "Head Revision".
Note:
When adding the SVN repository, you should see a progress indicator in the bottom right corner of Eclipse. If you get an error at this point, do not see a directory structure under the SVN container, or if you are stuck at 0% this is most likely due to not having proper permissions on your firewall.
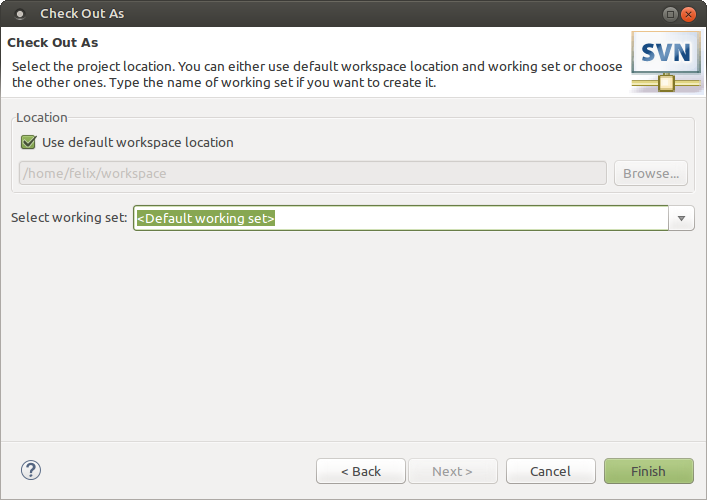
Next, choose a location for the project (the default workspace is fine) and use the default working set. Click on [Finish] and confirm all following dialogs with [Yes] or [OK]. Eclipse will download the project and set it up in the 'Workspace' folder. Close the welcome screen to have a look at the first project.
Repeat these steps with:
- svn://svn.jdownloader.org/jdownloader/browser
- svn://svn.jdownloader.org/jdownloader/trunk
- svn://svn.jdownloader.org/jdownloader/MyJDownloaderClient
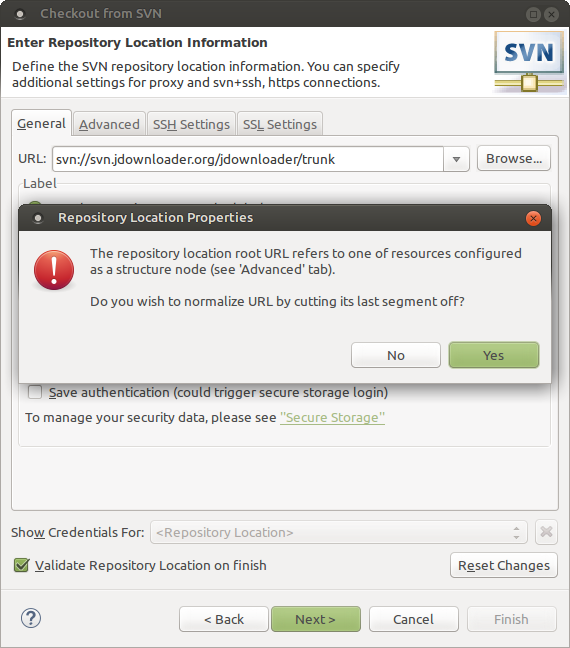
In case the following window pops up, asking you if you wish to normalize URL by cutting its last segment off, just click NO.
Normal Run

- In Eclipse's Package Explorer tab, navigate your project so that you expand the src folder, navigate to the JDownloader project and expand it. Now expand the src folder, then expand the org.jdownloader.startup folder and find the Main.java file (JDownloader Project -> src -> org.jdownloader.startup -> Main.java). Right-click on it, select Run As and and open the Run Configuration.
- A Run Configurations menu will open
- Select Java Application on the left side of the menu and click on the "New launch configuration" button above.
- Select the Arguments tab, and where it says "VM arguments:" enter the JVM Parameter -Xmx512m [If you do not do this you will get a memory error when you attempt to run]
- Add -debug -n in Program Arguments. This will always run a new instance (-n) and enable extended debugging logs (-debug)

- Click the Apply button, and then click Run. After the first start, JD will update to the latest version.
- You may now test out the latest beta version of JD and familiarize yourself with the code. When you are ready to start making changes, shoot us an e-mail with your intent or join the IRC channel and ask coalado or jiaz for login credentials.
Configuring Appwork Code Formatter
In order to keep code layouts the same between the different contributors' IDE setups, we prefer all commits to be made using our code formatter. In Eclipse, go to Settings -> Java -> Code Style -> Formatter and import the following file from your JDownloader workspace: workspace -> AppWorkUtils -> ide -> eclipse -> eclipse_format_file.xml


How can I upload (commit, write) my changes?
To upload to our code server, you need write access. Theoretically, anyone can get write access. There are of course a couple of requirements:
- Don't be evil
- JDownloader currently is GPL, but soon will change its license to a different Open Source/Commercial duallicense.
To get write access, please write us an e-mail with the following content: - Username (Your code will be published under this name)
- Allowance to relicense your commits. Example:
Herby I allow AppWork GmbH, Schwabacherstr. 117, 90763 Fürth, to re-license my (as user '<YOUR USERNAME>') commits to the JDownloader Code Server (svn.jdownloader.org). Re-licensing, in this case, means modifying and distributing my changes under a new license.


